Translation Basics for WPML- Translating Post and Page Content
This article addresses basics of using WPML for translating a site into multiple languages and is geared towards translators. This article has several parts and in this first part we will be addressing the dynamic content for Posts and Pages.
What is WMPL?
Very Simply, WPML (WordPress Multi Language) is a plugin for a WordPress powered site that allows for translation into multiple languages. In order to translate WordPress you should have some basic familiarity with WordPress itself. There are two sides to a WordPress site. The front-end is the part visible to anyone with the site url and the backend is the administrative portion of the site where any content is added. Luckily, the WordPress backend is one of the easiest and most intuitive of Content Management Systems (CMS) and is fairly easy to pick up. In order to get to the backend of the site you will have to have its url and special permissions which determine the content to which you will have access.
There are probably thousands of articles that explain how to use WordPress but as translators, the following are good places to start:
Another of particular interest will be WPML - Translating Your Contents. For the purposes of this article we will be doing manual translation. It is important to note that WPML offers professional translation so the site is geared primarily to site owners and administrators not to the translators themselves.
What Do I need to Translate?
There are two main components of a WordPress site: The database content (generally added through the backend of the site) and strings of text included by plugins and themes. These strings of text are usually short sentences and phrases (although they don’t have to be short) which are visible on the front-end of the site. We will address these in another article and see how WPML can help with translating them. For now we are going to concentrate on the database content starting with information in the content editor. If you are new to WordPress, I invite you to read this article about using the content editor.
About Posts and Pages
For anyone unfamiliar with WordPress the concept of Posts and Pages can be confusing. The most simple explanation is that a Post is like an article in a newspaper or magazine. The date of its publication is pertinent and usually it will be replaced by more recent information as time goes on. Posts are listed in reverse chronological order in what is known as a blog roll. The most recent post is therefore given precedence. Posts can be displayed on pages and are often referred to in widgets and linked to in the sidebar. Pages, on the other hand, contain static content. Pages represent the structure of the site and are often included in the navigation menu. Common examples of pages may include pages named Home, About Us, Blog, or Shop. For further information please refer to the links at the bottom of the article.
Translating your first Page or (Post)
We’ll start with the Home page, in this case, but any page or post will do. Although there are differences between pages and posts in the admin area, for the purposes of translation they are largely the same. From the front-end of the site our page looks like this:
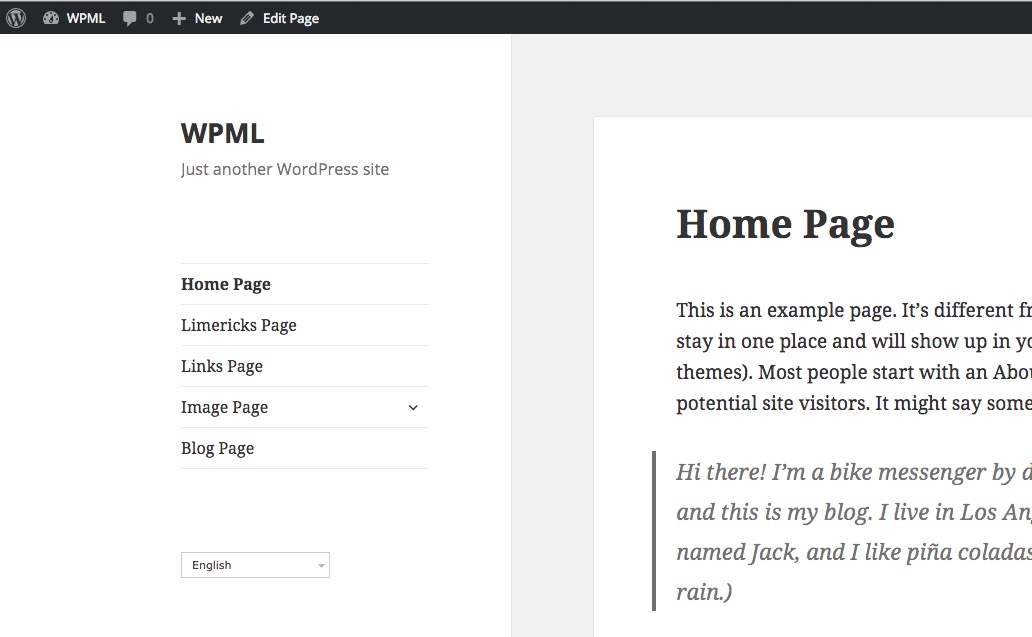
By clicking on Edit Page at the top left we can access the backend of the site. If the (usually) black bar does not appear at the top of the site you may need to log into the site first. Clicking this link will give you a very different view of the site which may look something like this :

You may find it helpful to keep two browser tabs open so you can toggle between the front-end and backend of the site while you are working.
The Language Panel
On the right side of the backend you will find a panel entitled Language and just below it one entitled Publish. The state you find them in will depend on the site you are working on and whether an administrator has set up the site for translation and the language of the page you are on. You may notice at the top of the page is a drop-down list denoting the current language. Always refer to this when determining the language of the page. 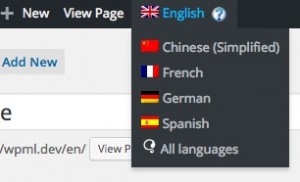 I cannot emphasize the importance of this enough as often page content is copied from the default language and it can be confusing at times to determine the correct language of a page. This can also be dangerous as the original language can be overwritten. In theory, the site administrator will have a backup system in place and measures will be taken to prevent this from happening but it is something to keep in mind.
Here are some examples of what your language panel may look like:
[caption id=“attachment_1173” align=“aligncenter” width=“279”]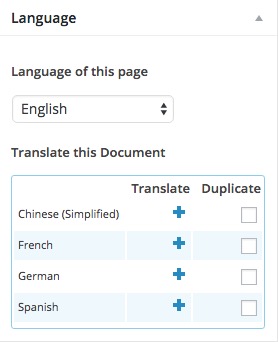 Language pages are not yet created[/caption]
[caption id=“attachment_1173” align=“aligncenter” width=“279”]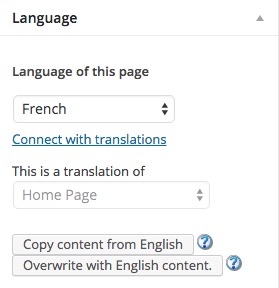 Page is a translation of an English Page into French[/caption]
The second Image of the Language panel is a result of clicking the plus sign in the first. In this case the pages for additional languages have not yet been created. The other possibility is that a site administrator has already created the pages in which case you will see something like this:
[caption id=“attachment_1177” align=“aligncenter” width=“278”]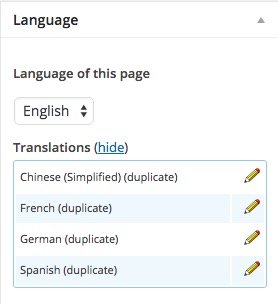 Language pages have already been created.[/caption]
In this case you will have to click on the pencil icon to see the appropriate page translation. You see here that the word duplicate is in parenthesis. This means that the content has been copied from the default language.
Methods of Translating
Upon going to the home Page in French, either by clicking on the pencil or from the dropdown menu at the top of the page, you will find something like this:
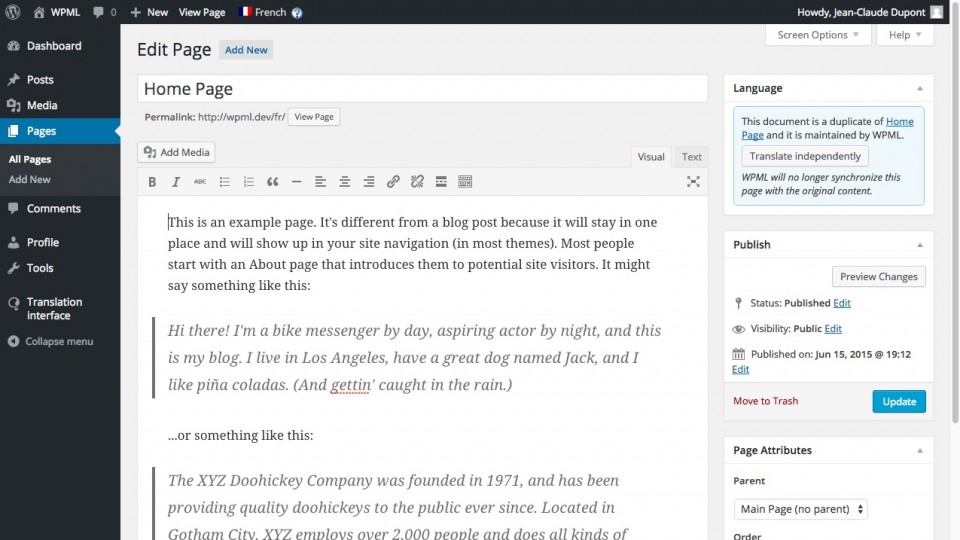
The number of menu items to the left of the page are a result of your user role set by the administrator. The first thing to do here is to click Translate Independently on the right top of your screen. This will keep any new content from being linked to default content and will again change the Language panel to the one with the little pencils.
The first thing to translate will be the Title. In this case Home Page. We will simply Delete Home Page and replace it with Page d’acceuil and then click the Update Button. 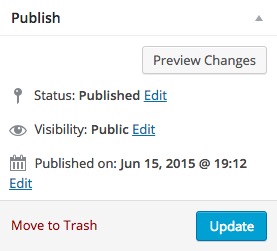 Translating the content is much easier if you know a little HTML. Don’t worry if you don’t though. Its very easy to learn and you can pick it up simply by looking at the Text Panel of the Visual Editor. Our page when viewed from the Text panel looks something like this:
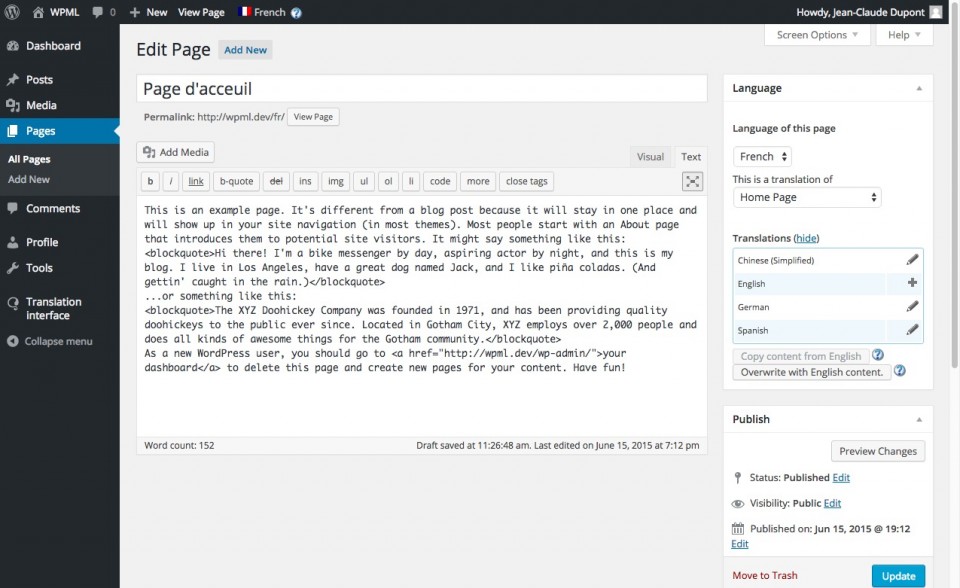
In my opinion, the easiest way to translate this would be to simply copy and paste a paragraph to be translated directly below the one in the default language. Translate the text and then delete the original language taking care to ignore anything in brackets such as <blockquote> </blockquote> or <a href="http://wordpress.org">. There may also be shortcodes which are in square brackets and look something like [random_display_form id=14]. You will want to ignore any text within square brackets.
However, there are probably as many methods to doing this as there are translators. One translator I know copies the text from the Visual panel into Google translate and then corrects it. She then formats it using the the tools provided in the toolbar. Some people prefer to translate outside of the WordPress editor. In this case I would suggest not using something like Microsoft Word as it will apply formatting to the text which may be complicated to override. Microsoft’s Notepad or TextEdit for Mac would be a better bet.
It is always a good idea to keep a backup of your translations white translating, particularly anything long and time-consuming. Again, I would suggest copying and pasting the translation into a non-formatting text editor like Notepad or TextEdit.
Probably the most important thing to remember is to click the Update or Publish button frequently and when you have finished your translation. This is the WordPress equivalent to saving your work.
Please feel free to ask questions in the comments and to let me know if anything is unclear or needs further explanation. I will likely be writing subsequent articles about other steps in translating a site with WPML.