Incorporting Webpack into a WordPress theme (part 3)
This is the final part of a 3 part series of articles/tutorials. The preceding two parts can be seen here:
Part 3 - BrowserSync and Maximising Coverage
Browsersync and Webpack dev Server
Many of who have used task runners like Grunt or Gulp are used to developing without needing to refresh the page after each change. Webpack comes with webpack-dev-server which may suit some WordPress setups just fine. If you have a relatively straight-forward setup feel free to use it by adding the following script to the scripts in your package.json
  "scripts": {
    "test": "test",
    "start": "webpack --watch",
    "serve": "webpack-dev-server --open"
  },
Webpack uses HRM, or Hot Module Replacement, as opposed to Livereload which is often used in Grunt and Gulp workflows in order to instantly reflect changes in files in the browser. Where Livereload refreshes the whole page, HMR injects the changes only concerning the module in question. This makes for much faster updated content- so fast that it can even be disconcerting at times.
The main problem with webpack-dev-server is that its proxy option isn’t very flexible. There are ways using the manifest.json provided in the build to allow for Hot Module replacement within a Wordpress theme but for the most-part BrowserSync is a lot easier. It is especially useful if you are using a VM.
Here is the proxy configuration for a dev site using VVV. The config.js file refers to site-specific urls. (Edit: The devServer object is not necessary if you are using BrowserSync. You can choose on of the other depending on your environment.)
  const config = require('./config.js');
  const ExtractTextPlugin = require("extract-text-webpack-plugin");
  const BrowserSyncPlugin = require('browser-sync-webpack-plugin');

  devServer: {
    historyApiFallback: true,
    compress: true,
    port: 9000,
    https: config.url.indexOf('https') > -1 ? true : false,
    publicPath: config.fullPath,
    proxy: {
      '*': {
        'target': config.url,
        'secure': false,
      },
      '/': {
        target: config.url,
        secure: false,
      }
    },
  },
  plugins: [
    new ExtractTextPlugin({
      filename:  (getPath) => getPath('css/[name].css').replace('css/js', 'css'),
      allChunks: true
    }),
    new BrowserSyncPlugin( {
        proxy: config.url,
        files: [
          '**/*.php',
        ],
        reloadDelay: 0,
      }
    )
  ]
Now when we run npm start we get a new window that opens in the browser at http://localhost:3000/.
Code coverage
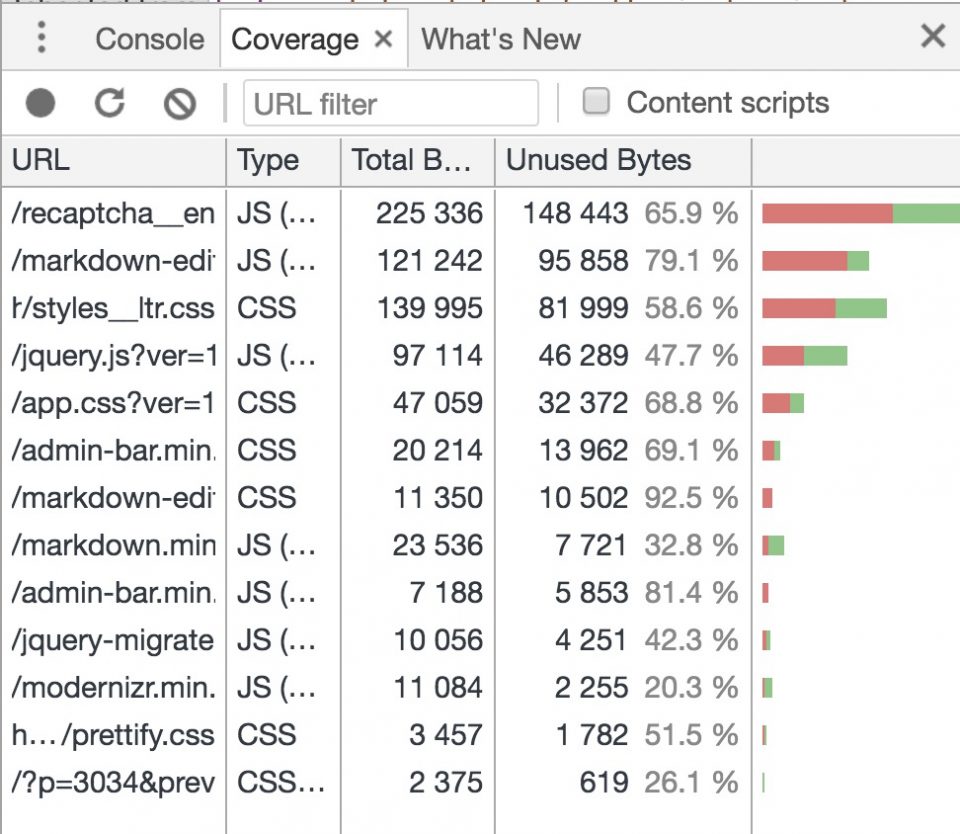
Coverage, in this case, refers to the amount of code present that is actually being used in a page. It is very difficult to have 100% coverage of your CSS in a dynamic site. The more editorial flexibility provided, the more potentially wasted code is present. In a WordPress custom built theme there are likely static pages with content that may never change (or change only slightly.) These provide great opportunities for modules of a specific template to have a minimum of assets provided. However, in order to do to this you will have to fine-tune the way modules are constructed.
For example a static landing page might not include styles and scripts associated with the sidebar nor would it include styles for any elements that not included on the page. Chrome (59) has a good tool for inspecting coverage in its developer tools that can help maximise CSS and Javascript used on a single page. Firefox has projects for a similar tool.
 This page does not benefit from optimal code coverage
Tree-shaking
Tree-shaking refers to dead code elimination in javascript and is not preformed by Webpack itself, rather by a plugin such as the UglifyjsWebpack Plugin. In our example theme we will start by installing it with :
npm i -D uglifyjs-webpack-pluginat the top of webpack.config.js we will add
const UglifyJsPlugin = require('uglifyjs-webpack-plugin');and to our plugins :
  new UglifyJsPlugin({
    sourceMap: true,
    uglifyOptions: {
      ie8: false,
      ecma: 8,
      mangle: true,
      output: {
        comments: false,
        beautify: false,
      },
      warnings: false
    }
  })
It is best to play around with these settings and to know your code in order to maximise this feature.
In order to better illustrate the configuration for these articles I have created a starter theme which you can download or clone here. Please bear in mind that it is a work in progress so changes may occur frequently.
Going further with Webpack
This series of articles ends here but there are several steps not discussed. Often sites build with Webpack have two config files; One for development and another for production. Plugins used for development purposes (Browsersync for example) are separated from a production configuration which would include minimisation and uglification. As mentioned earlier, Webpack dev server is another alternative to using Browsersync and K. Adam recently explained the process in a recent talk at WordCamp US which should eventually be available here Better Webpack Builds. While these articles are appropriate for a traditional PHP templated theme, they don’t really tackle the specifics of headless themes or single page apps.
Please don’t hesitate to relate your own experiences with WordPress themes using Webpack in the comments.